Archive for the ‘GNU/Linux’ Category
Multiple FLRig with Persistent Device Mapping
Multiple FL Rig configurations
So you have multiple transceivers with CAT control being controlled by a single PC (Linux of course); this is easy enough to control with multiple instances of FLRIG as you just start it with:
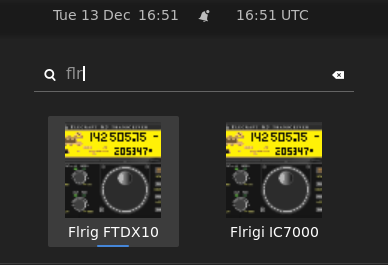
% flrig --config-dir /home/mylogin/radio1 (etc)If you use gnome you can also add launchers with different names such as
/usr/local/share/applications/flrig-radio1.desktopand make sure you edit to name and pick up the desired configuration:
[Desktop Entry]
Name=Flrigi Radio1
GenericName=Amateur Radio Rig Control
Comment=Amateur Radio Communications
Exec=flrig --config-dir /home/mylogin/radio1
Icon=flrig
Terminal=false
Type=Application
Categories=Network;HamRadio;
USB Device Persistence
The main issue remaining is when you switch USB connectors on in a different order and the serial convertor ones for the CAT appear inconsistently to be /dev/ttyUSB0…N.
Turns out you can use udev rules to map symbolic links to the USB device by looking up vendor and product in the udev rules. I have also added the serial number of the device as I have two USB adaptors on my ICOM with the same chip . USB id for CAT and PTT/Sound. Use lsusb and similar tools to find the vendor, product and serial numbers of your devices.
For instance when I type lsusb fro radio devices I get:
YAESU
Bus 008 Device 007: ID 08bb:29c3 Texas Instruments PCM2903C Audio CODEC
Bus 008 Device 006: ID 10c4:ea70 Silicon Labs CP2105 Dual UART Bridge
Bus 008 Device 005: ID 0424:2512 Microchip Technology, Inc. (formerly SMSC) USB 2.0 Hub
ICOM
Bus 002 Device 022: ID 0d8c:0024 C-Media Electronics, Inc. USB Advanced Audio Device
Bus 002 Device 024: ID 0403:6001 Future Technology Devices International, Ltd FT232 Serial (UART) IC
Bus 002 Device 023: ID 0403:6001 Future Technology Devices International, Ltd FT232 Serial (UART) IC
Bus 002 Device 021: ID 058f:6254 Alcor Micro Corp. USB Hub
and so I created a
/etc/udev/rules.d/50-radios.rulesfile as below
SUBSYSTEM=="tty", ATTRS{idVendor}=="10c4", ATTRS{idProduct}=="ea70", ATTRS{serial}=="011F4194", SYMLINK+="YAESU", MODE="0666"
SUBSYSTEM=="tty", ATTRS{idVendor}=="0403", ATTRS{idProduct}=="6001", ATTRS{serial}=="A4001jMj", SYMLINK+="ICOM1", MODE="0666"
SUBSYSTEM=="tty", ATTRS{idVendor}=="0403", ATTRS{idProduct}=="6001", ATTRS{serial}=="A20e1voc", SYMLINK+="ICOM2", MODE="0666"

Update: After some digging around to see how I can get the two Yaesu ports from the same device with the same serial with distinct SYMLINKs - I found that you could enumerate the "interface number" from teh usb data and allocate to an environment variable -= so the YAESU line above has been replaced by:

SUBSYSTEMS=="usb", ENV{.LOCAL_ifNum}="$attr{bInterfaceNumber}"
SUBSYSTEM=="tty", ATTRS{idVendor}=="10c4", ATTRS{idProduct}=="ea70", ATTRS{serial}=="011F4194", SYMLINK+="YAESU%E{.LOCAL_ifNum}", MODE="0666"
So now when I plug the devices in any order I can use the symlinks /dev/ICOM1 etc in flrig to have a persistent device irrespective of when/where this was mapped. Currently, these look like this:
lrwxrwxrwx 1 root root 7 Dec 13 16:46 /dev/ICOM1 -> ttyUSB4
lrwxrwxrwx 1 root root 7 Dec 13 16:46 /dev/ICOM2 -> ttyUSB5
lrwxrwxrwx 1 root root 7 Dec 13 08:28 /dev/YAESU00 -> ttyUSB1
lrwxrwxrwx 1 root root 7 Dec 13 08:28 /dev/YAESU01 -> ttyUSB2
So essentially, as long as you use the symbolic link it matters not what ttyUSB number the device is mapped to.
Remember to restart the udev service to pick up the new rules ( or reboot ).
udevadm control --reload-rules && udevadm triggerDisclaimer: This code is
from a hardware engineer turned hacker, it most likely aint pretty, it
most likely can be done better but …. it works
What’s my eternal IP – extended for reverse host lookup
I wanted a simple little line which gave me either my external up (and revere host if it exists) or lookup on a command line.
So we have a simple bash script which is:
ipinfo.sh [ ip-address ] ( examples: 1. ipinfo.sh 2. ip-info.sh 8.8.8.8 )
The parameter ‘ip-address’ is optional – if not given will fetch your current external address and use that.
#!/bin/bash # Parameter 1 is IP address of nothing # If nothing then get external IP if [ -x $1 ]; then IP=$(dig TXT +short o-o.myaddr.l.google.com @ns1.google.com | awk -F'"' '{ print $2}'); else IP=$1; fi XML=$(curl -s https://api.geoiplookup.net/?query=$IP) host=$(dig +noall +answer -x $IP | awk '{print $5'}) isp=$(echo $XML | xmllint --xpath "string(//isp)" - ) echo "Found host: $host [$IP] from isp ($isp)"
Disclaimer: This code is from a hardware engineer turned hacker, it most likely ain’t pretty, it most likely can be done better but …. it works.
Goodbye truecrypt
Well I have been using this encryption product for a while (truecrypt). The code has not been updated for a while (2012) and despite a funded audit it has not really been progressed for a couple of years. The sourceforge truecrypt site now recommends use anything else as reported in places like this!!
So what do I do for my personal and work data? As I use Linux then obvious choice would be one of the available encrypted file systems. This is the story of how I moved them across. Firstly I decided to use cryptsetup for no apparent reason apart from the fact it was bundled in the disto and supported up-to-date algorithms with the underlying dm-crypt kernel module and LUKS.
I use lvm to managed my storage and currently a 64Gb lvm logical volume ( tc1 on group ubunut-vg ) is used as a truecrypt drive. So the number one step is to create a new volume for the new drive of the same size.
$ sudo lvcreate -L 64G ubuntu_vg tc2
If you want to be paranoid you can check for bad blocks (not much point on lvm but may be useful if you are using physical disks) and then randomize the data:
$ sudo /sbin/badblocks -c 10240 -s -w -t random -v /dev/ubuntu-vg/tc2 $ sudo dd if=/dev/urandom of=/dev/ubuntu-vg/tc2
Now you can create the LUKS partition on the new logical volume; here with AES encryption using a keysize of 256 (we are also using SHA-2 hashing). Remember to choose something strong for a pass-phrase (and memorable – I use a quotation however being somewhat dyslexic it is never spelt correctly but it is consistent 🙂
$ sudo cryptsetup --verify-passphrase --cipher=aes-cbc-essiv:sha256 --key-size=256 --hash=sha256 luksFormat /dev/ubuntu-vg/tc2
Now we can set the mapper to register that partition
$ sudo cryptsetup luksOpen /dev/ubuntu-vg/tc2 tc2
I suppose we really out to put a file-system on it too; I will use ext4 for this.
$ sudo mke2fs -t ext4 /dev/mapper/tc2
Now I just copy the data across by mounting a temporary mount point and synchronising with rsync
$ sudo mkdir /mnt/tc2 $ sudo mount -t ext4 /dev/mapper/tc2 /mnt/tc2 $ rsync -avx --progress /media/truecrypt1/ /mnt/tc2
When this is complete I can delete the old truecrypt volume and update symbolic links or otherwise just map onto the old mount point. Two files to edit to get this to new drive to mount from boot.
/etc/fstab
/dev/mapper/tc2 /mnt/tc2 ext4 defaults 1 2
And of course you need an entry in /etc/crypttab to prompt for pass-phrase and key into the logical encrypted volume.
tc2 /dev/ubunutu-vg/tc2 none luks
Works for me!
Disclaimer: This code is
from a hardware engineer turned hacker, it most likely aint pretty, it most likely can be done better but …. it works.
Linux Host with Windows (8, 8.1) Guest – Tales of woe and triumph – #1 Setting the scene
Setting the scene
A new laptop arrived for my daily hacking. This is a *large* dell with i7 8-core / 8Gb and massive 1920 width screen supplemented by a Nvidia 2Gb mobile GPU (a story in itself since it is dual intel/nvidia and a voyage into bumblebee, optimus and prium ensued.
Being a Dell this came primed with Window 8 – I could not make head nor tail of this until I installed classic shell (thanks guys) which made it almost usable. As this was pre-installed I loaded all my required software (mucho), configured it and then proceeded to fight multiple blue screens, corruption and restore. I even tried using Ubunutu as guests on M$ hyper-V. Well it was all worth a try wasn’t it (UEFI boot will be the subject of another post).
So, after ruining a good few evenings I decided to give up and do it properly. This meant Ubuntu 13.10 host with Windows guest and virtual network with all data stored on a truecrypt logical volume on the host shared on samba. I decided to use lvm and establish a logical partition for the windows system to use; this proved useful later as a snapshot of the windows sub-partitions can be done using kpartx -a <logical lvm> then ntfsclone on the visible sub-partition (don’t get me started on fsarchiver and ntfs….).
This has now been running for some months, I regularly take a snapshot of the virtual “just in case” and all works hunky dory (although 13.04 to 13.10 killed USB hot swap – an apparmor and libvirt issues solvable) and sound issues (mainly though I use a usb headset passed to the guest for dragon naturally speaking).
More details to follow on how do do al this without the rabbit holes and gotcha’s I enjoyed along the way …
Code:
#!/bin/bash
echo "echo"
UFW Firewall Profile Switch
I use my laptop on my home network where I need to share files and other services on two networks. Alternatively I use the laptop on a open broadband connection in an office or in hotel/B&B networks. Obviously I do not want all the ports/networks open when away. The firewall rules are stored in /lib/ufw (on Ubunutu anyway – your mileage may vary with distribution) and so I just configure two types of rule-sets and use a script to open the ones I want and reload the firewall rules from the file.
After configuring a rule-set with ufw / gufw I save these to a file (tar) with a name rules_<profile>.tar So now I just call a script (below) ufwprofile rulesetname and it is unpacked and activated. Simples!
#!/bin/bash
cd /lib/ufw
FILE=rules_$1.tar
echo "Requesting ufw profile $1 in $FILE"
if [ -f $FILE ]
then
   tar cvf rules_bak.tar *.rules
   tar xvf $FILE
   ufw reload
else
echo "$FILE Not found!   "
fi
So what happens if I forget to do this. I actually run a daemon (actually a regular cron job) which checks for some known signatures on the home network (SNMP keyed string from my server); if it is not home and the home profile is enabled it uses the script above to set “away”. Job done!
AES256 with gpg
I needed to quickly encrypt some files, and symmetric encryption was more than adequate. I considered that AES256 would be a nice algorithm (good enough for the NSA good enough for me 🙂 ).
So there are the are some AES 256 tools however the GNU version of PGP does include symmetric encryption. To define the algorithm and to do this nicely preserving the original file (only encrypt the one going to the backup store) involves a few fiddly command-line parameters that I didn’t want to have to retype. Declaring an alias was also a little bit of a nause with passing multiple parameters.
In the end I defined a shell function which does what I wanted to do whilst also allowing the passing parameters and preservation of the original file. These is a short function I added to my .bashrc
function enc()
 {
      gpg -v --symmetric --cipher-algo aes256 -o $1.gpg $1
 }
 function dec()
 {
       gpg -v -d -o $1 $1.gpg
 }
so now I can simply encrypt file, say hello.txt, using the following:
enc hello.txt
and also decrypted from its hello.txt.gpg form using the this line:
dec hello.txt
notice no .gpg required to be specified as the encrypted version is implied from the original file-name.
Linux dropbox – pause from command and cron
Background
I use duplicity (compressed & encrypted differential backups) and need to replicate these off-site. One of the more cost effective ways to to this is use cloud storage such as drop box. I wanted to take advantage of the drop box client installed on a user account on my server and avoid the hassle of writing scripts to use the drop box api to keep the file stores in sync.
This works fine but the dropbox function works as a user process then the user is logged in. No problem except if you use a cron job / cli to stop the process and restart you loose the icon on the desktop.
So why do I want to stop start? Simples – I have “free” bandwidth between 11pm and 8am and would rather upload Gbytes of backup then.
So how do I stop this running from cron each day and restart without interring with the user control widget?
The sledge-hammer approach seems to be to stop the process by sending it a signal and then continue the process when the bandwidth is free. Amazingly this seems to work. How do you do this? To stop a process send a kill -STOP signal to the process and to restart use kill -CONT. The drop box usermode daemon usefully records it’s process ID (PID) in <user home>/.dropbox/dropbox.pid so pick it from there.
The resultant script I use can be seen below and is called with % script.sh [ STOP | START ]
The script:
#!/bin/bash
PID=`cat  ~/.dropbox/dropbox.pid`
if [ "$1" == "STOP" ]
then
   kill -STOP $PID
elif [  "$1" == "START" ]
then
   kill -CONT  $PID
else
   echo "I do not understand - use START or STOP "
fi
ps -aux | grep $PID
